Sometimes we may need to send data from a place where there are no local networks or wifi available. if the sensor or data source is in a very remote location we can use 3G/4G Yagi antenna pointing to the mobile tower. I have created a simple complete setup from sensor → micro controller → SIM module → http post server using PHP → Sqlite database → web page (data visualisation & google graph using JavaScript) → Excel file download facility.
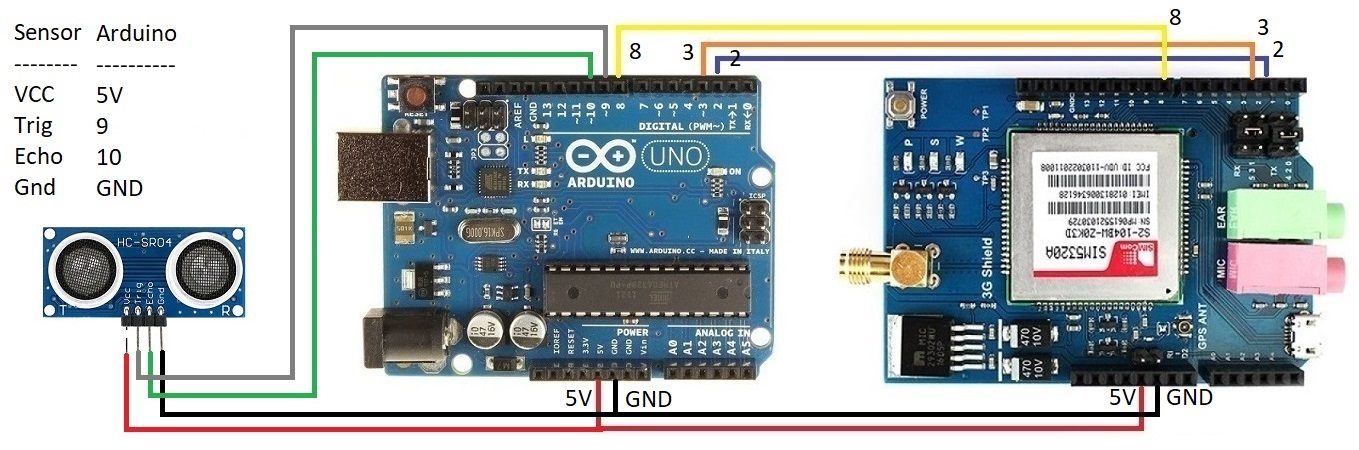
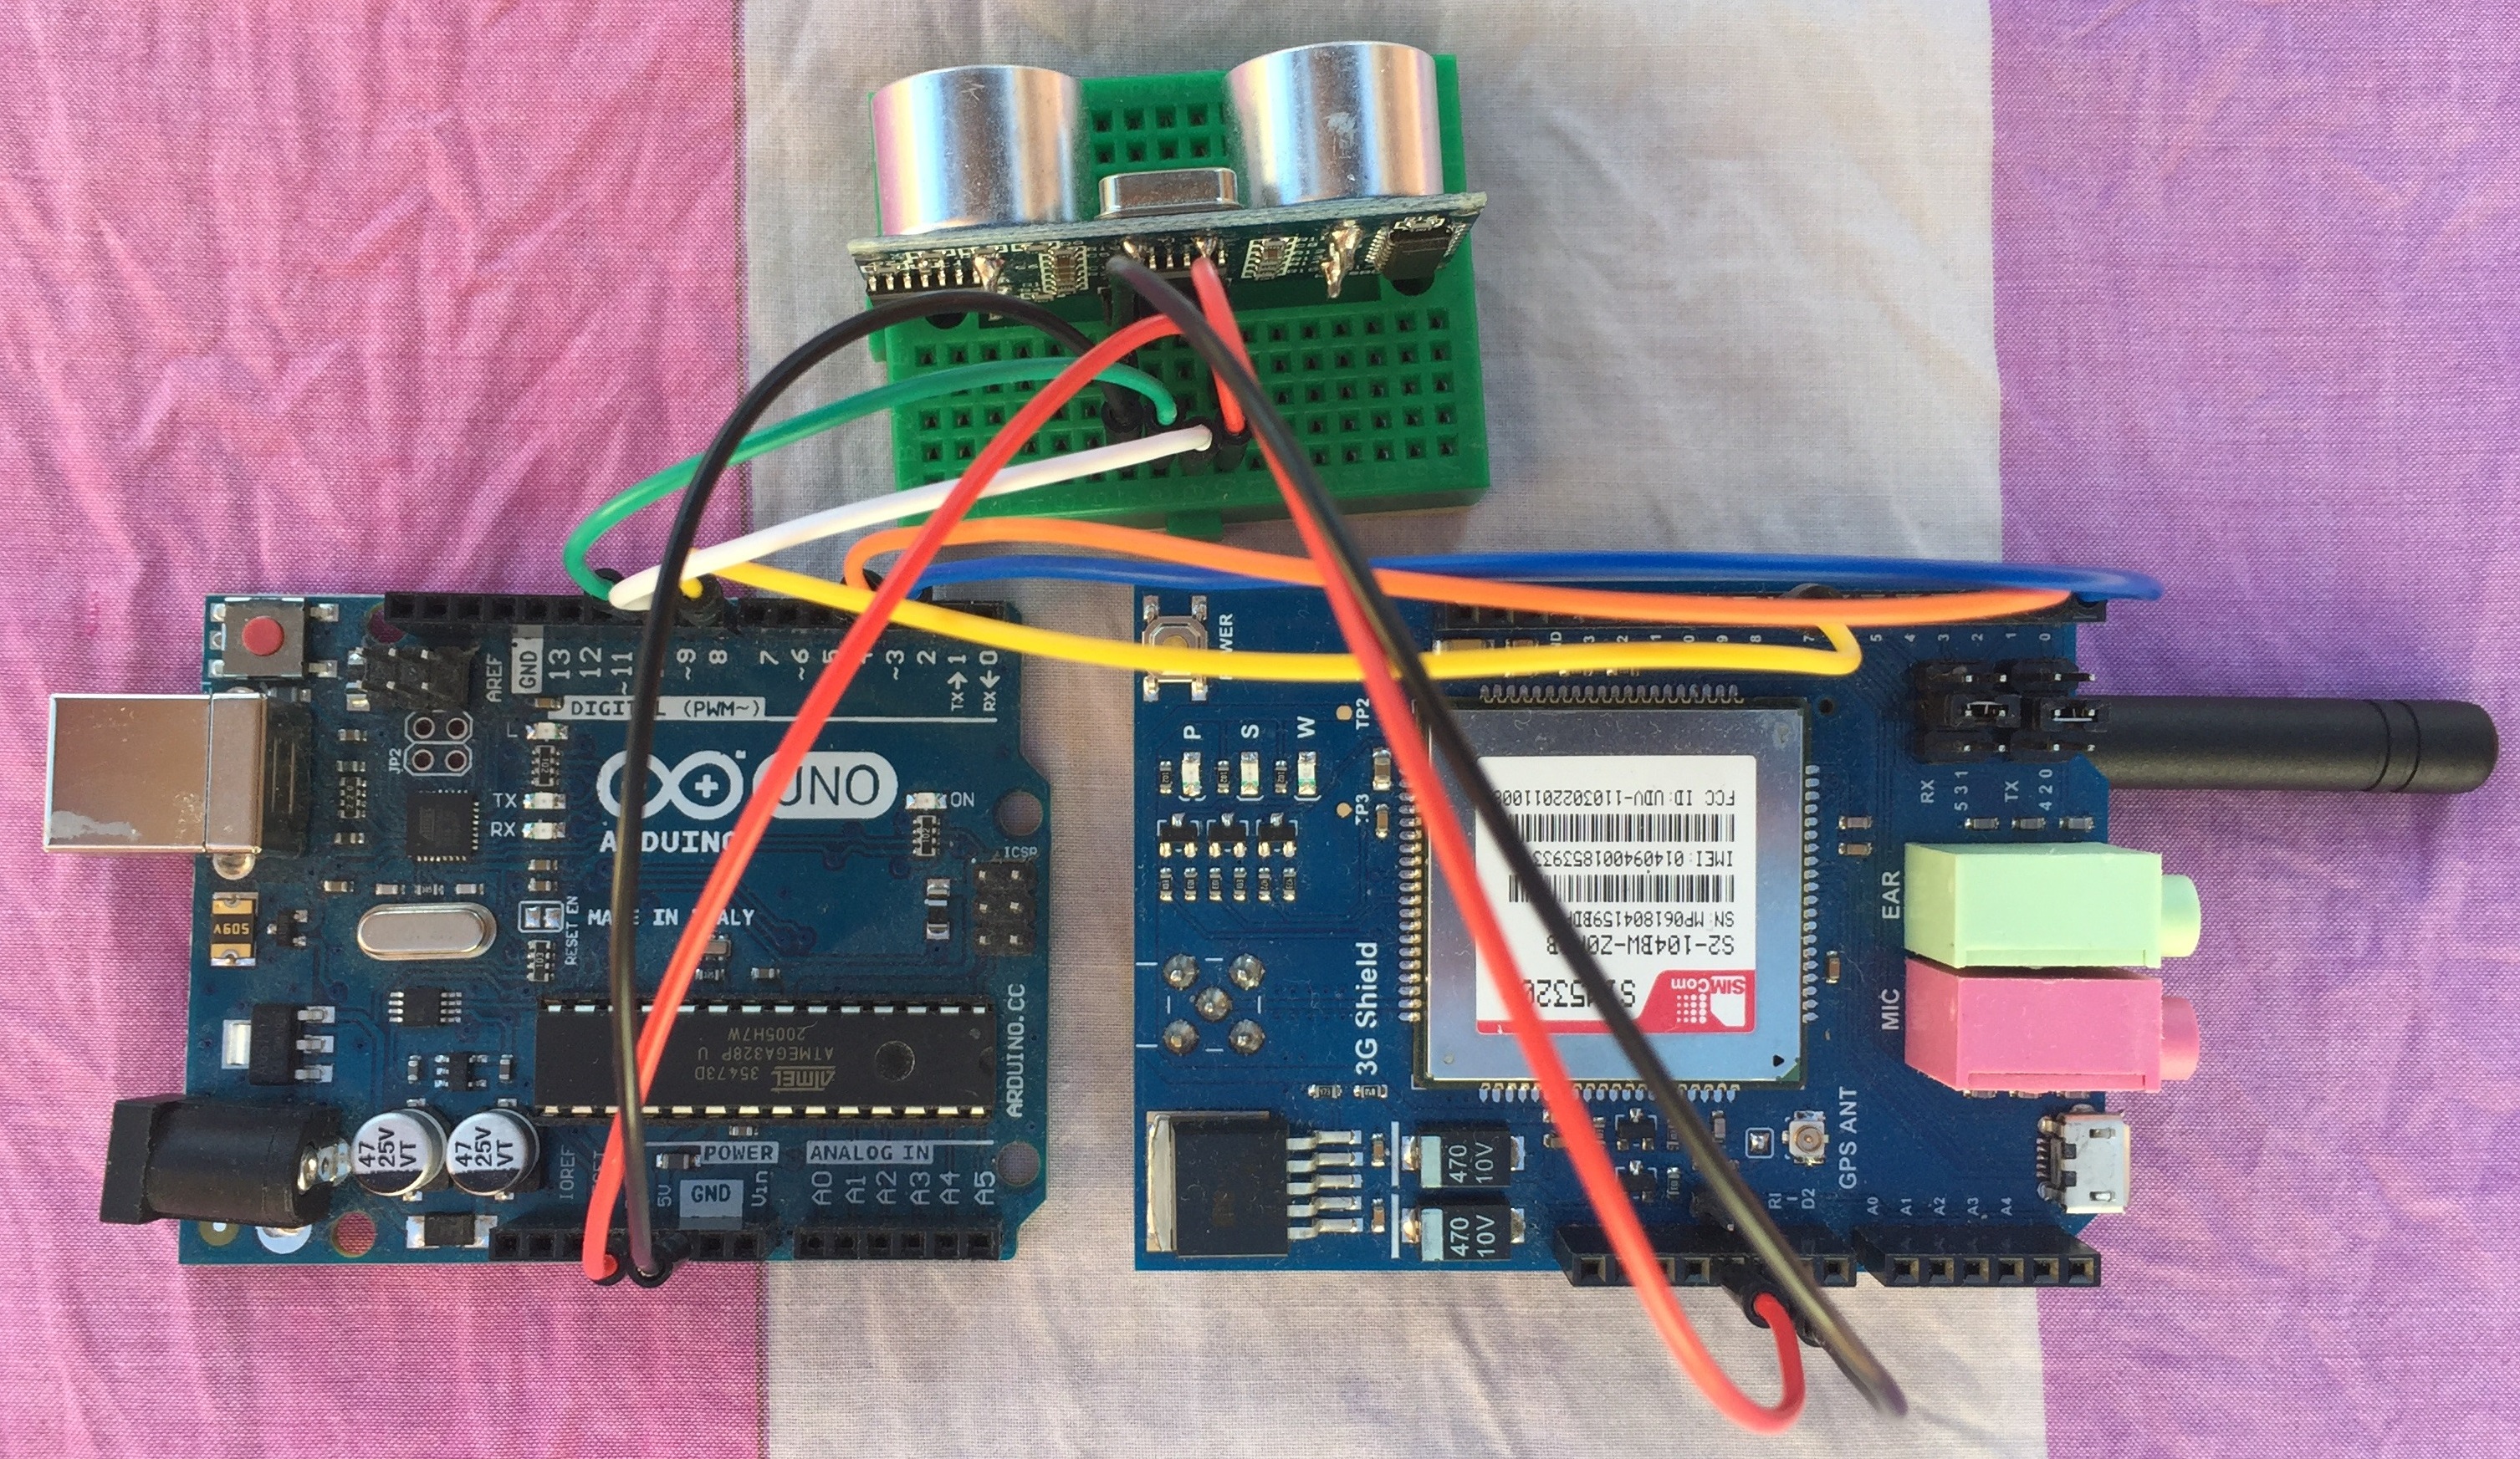
The module I am using is a shield on top of Arduino. It requires no wiring just plug it in. Anyway I have shown the wiring diagram in case if you want to use it separately. The module includes proper power regulator, so we can connect 5V to the 5V pin. Also the TX/RX serial communication already includes necessary TTL level shifter.
SIM5320 comes in American version SIM5320A and European version SIM5320E. If any other countries, we need to check the local mobile-phone provider frequency. SIM5320A module can work with 850MHz and 1900MHz 3G frequencies while SIM5320E module can work with 900MHz and 2100MHz 3G frequencies. For example, I used SIM5320A in Australia as the mobile provider Telstra uses 850MHz as one of their 3G frequency.
AT command manual, Schematic and Datasheet can be found in the following links. https://www.tinyosshop.com/3g-gprs-gsm-shield-for-arduino-sim5320a and https://www.tinyosshop.com/3g-gprs-gsm-shield-for-arduino-sim5320e
There are few steps in this project. So I have listed them below
Go to https://www.awardspace.com/ and click Free Signup button
Fill in Your name, Email address and create a password.
Click Register Now Button
Check your email and click the activation link.
Go again to https://www.awardspace.com/ and click Login button
Click Hosting Tools → Domain Manager then click Create a Free Subdomain and type a name you like. If it is already taken by someone, you will get "This subdomain name already exists in our system" message. Try again with different one. When it is successful, please note this domain name ******.atwebpages.com
This will be your domain name. You can access it from anywhere in the world. You will need to include it in the Arduino sketch for posting of the sensor data to your free server.
Now Click Hosting Tools → File Manager then double click ******.atwebpages.com CREATE 3 (THREE) FILES
For the first file, click Create button and select create file option type insert.php then Create button
Double click insert.php file and paste the following code there
<!--  insert.php file start here  -->
<?php
    $key = "";
    $distance = "0";
    if (isset($_POST['key'])) $key = $_POST['key'];
    if (isset($_POST['distance'])) $distance = $_POST['distance'];
    if ($key = "a@4K%3") {
      $date = time();
      $intdistance = intval($distance);
      $db = new PDO('sqlite:readingsDB.sqlite');
      $db->exec("CREATE TABLE IF NOT EXISTS readings(date INTEGER, distance INTEGER)");
      $db->exec("INSERT INTO readings(date, distance) VALUES('$date','$intdistance');");
      echo "ok";
    }
?>
<!--  End of insert.php file  -->
Cilck save button then Cilck close button
For the second file, click Create button again and select create file option type index.php then Create button
Double click index.php file and paste the following code there
<!--  index.php file start here  -->
<!DOCTYPE html>
<html lang="en">
<head>
    <meta charset="UTF-8">
    <meta http-equiv="X-UA-Compatible" content="IE=edge">
    <meta name="viewport" content="width=device-width, initial-scale=1.0">
    <style>
        table {
        font-family: arial, sans-serif;
        border-collapse: collapse;
        }
        td, th {
        border: 1px solid #dddddd;
        text-align: left;
        padding: 8px;
        }
        tr:nth-child(even) {
        background-color: #dddddd;
        }
        </style>
    <title>Sensor Readings</title>
</head>
<body>
    <h1>Sensor Readings</h1>
    <form action="/excel.php">
        <label for="selectDay1">Date:</label>
        <input type="date" id="selectDay1" name="selectDay1">
        <input type="submit" value="Download">
    </form>
    <form action="/index.php">
        <label for="selectDay2">Date:</label>
        <input type="date" id="selectDay2" name="selectDay2">
        <input type="submit" value="Refresh">
    </form>
    <div id="chart_div"></div>
    <p></p>
    <table>
        <tr>
            <th>Date (GMT or Iceland Time)</th>
            <th>Reading</th>
        </tr>
        <?php
            $selectDay = 0;
            if (isset($_GET['selectDay2']) && $_GET['selectDay2']!="") {
                $selectDay=strtotime($_GET['selectDay2']);
            } else {
                $selectDay=time()-43200;
            }
            $nextDay = $selectDay+86400;
            $db = new PDO('sqlite:readingsDB.sqlite');
            $query = "SELECT * FROM readings Where date  BETWEEN " .$selectDay." AND ".$nextDay." ORDER BY date DESC";
            $result = $db->query($query);
            foreach($result as $row) {
                print "<tr><td>".date('d/m/Y H:i:s', $row['date'])."</td>";
                print "<td>".$row['distance']."</td></tr>";
            }
        ?>
    </table>
    <?php
        $query = "SELECT * FROM readings Where date  BETWEEN " .$selectDay." AND ".$nextDay." ORDER BY date ASC";
        $result = $db->query($query);
        $rows[][] = array();
        $rows[0][0] = "Date";
        $rows[0][1] = "Sensor Readings";
        $count=1;
        foreach($result as $row) {
            $rows[$count][0] = date('H:i', $row['date']);
            $rows[$count][1] = intval($row["distance"]);
            $count++;
        }
        $jsonTable = json_encode($rows);
    ?>
    <script type="text/javascript" src="https://www.gstatic.com/charts/loader.js"></script>
    <script type="text/javascript">
        google.charts.load("current", {packages:["imagelinechart"]});
        google.charts.setOnLoadCallback(drawChart);
        function drawChart() {
            let data = google.visualization.arrayToDataTable(<?php echo  $jsonTable; ?>);
            let chart = new google.visualization.ImageLineChart(document.getElementById('chart_div'));
            let options = {'title':'Sensor Readings', 'showCategoryLabels':false, 'min':0};
            chart.draw(data, options);
        }
    </script>
</body>
</html>
<!--  End of index.php file  -->
Cilck save button then Cilck close button
For the third file, click Create button again and select create file option type excel.php then Create button
Double click excel.php file and paste the following code there
<!--  excel.php file start here  -->

<?php
    header('Content-Type: application/xls');
    header('Content-Disposition: attachment; filename=Readings.xls');
?>
<table>
    <tr>
        <th>Date (GMT or Iceland Time)</th>
        <th>Readings</th>
    </tr>
    <?php
        $selectDay = 0;
        if (isset($_GET['selectDay1']) && $_GET['selectDay1']!="") {
            $selectDay = strtotime($_GET['selectDay1']);
        } else {
            $selectDay = time()-43200;
        }
        $nextDay = $selectDay+86400;
        $db = new PDO('sqlite:readingsDB.sqlite');
        $query = "SELECT * FROM readings Where date  BETWEEN " .$selectDay." AND ".$nextDay." ORDER BY date DESC";
        $result = $db->query($query);
        foreach($result as $row) {
            print "<tr><td>".date('d/m/Y H:i:s', $row['date'])."</td>";
            print "<td>".$row['distance']."</td></tr>";
        }
    ?>
</table>
<!--  End of excel.php file  -->
Cilck save button then Cilck close button
Click Sketch → Include Library → Manage Libraries...
Type TinyGSM in the Filter your search area
Click Install TinyGSM Library
Copy the following code into the Arduino IDE
// Arduino file start here
#define TINY_GSM_MODEM_SIM5360
#define SerialMon Serial
#include <SoftwareSerial.h>
SoftwareSerial SerialAT(2, 3); // RX, TX
#if !defined(TINY_GSM_RX_BUFFER)
#define TINY_GSM_RX_BUFFER 650
#endif
#define TINY_GSM_YIELD() { delay(2); }
const char apn[]  = "telstra.internet"; // Change this to your Provider details
const char gprsUser[] = "";
const char gprsPass[] = "";
const char server[] = "nizarmohideen.atwebpages.com"; // Change this to your selection
const char resource[] = "/insert.php";
const int  port = 80;
unsigned long timeout;

const int trigPin = 9;
const int echoPin = 10;

long duration;
int distance;

#include <TinyGsmClient.h>
TinyGsm modem(SerialAT);
TinyGsmClient client(modem);
#define SIM_POWER 8

void setup() {
  pinMode(SIM_POWER, OUTPUT);
  digitalWrite(SIM_POWER, HIGH);
  delay(180);
  digitalWrite(SIM_POWER, LOW);
  delay(3000);

  pinMode(trigPin, OUTPUT);
  pinMode(echoPin, INPUT);

  SerialMon.begin(4800);
  delay(10);
  SerialMon.println("Wait...");
  SerialAT.begin(4800);
  delay(600);
  SerialMon.println("Initializing modem...");
}

void loop() {
  digitalWrite(trigPin, LOW);
  delayMicroseconds(2);
  digitalWrite(trigPin, HIGH);
  delayMicroseconds(10);
  digitalWrite(trigPin, LOW);
  duration = pulseIn(echoPin, HIGH);
  distance = duration * 0.034 / 2;

  modem.restart();
  SerialMon.print("Waiting for network...");
  if (!modem.waitForNetwork()) {
    SerialMon.println(" fail");
    delay(1000);
    return;
  }
  SerialMon.println(" success");
  if (modem.isNetworkConnected()) {
    SerialMon.println("Network connected");
  }

  SerialMon.print(F("Connecting to "));
  SerialMon.print(apn);
  if (!modem.gprsConnect(apn, gprsUser, gprsPass)) {
    SerialMon.println(" fail");
    delay(1000);
    return;
  }
  SerialMon.println(" success");

  if (modem.isGprsConnected()) {
    SerialMon.println("GPRS connected");
  }

  if (!client.connect(server, port)) {
    SerialMon.println(" fail");
  }
  SerialMon.println("Performing HTTP POST request...");
  String httpRequestData = "key=a@4K%3&distance="+ String(distance) +"";
  client.print(String("POST ") + resource + " HTTP/1.1\r\n");
  client.print(String("Host: ") + server + "\r\n");
  client.println("Connection: close");
  client.println("Content-Type: application/x-www-form-urlencoded");
  client.print("Content-Length: ");
  client.println(httpRequestData.length());
  client.println();
  client.println(httpRequestData);
  timeout = millis();
  while (client.connected() && millis() - timeout < 10000L) {
    while (client.available()) {
      char c = client.read();
      SerialMon.print(c);
      timeout = millis();
    }
  }
  SerialMon.println();
  client.stop();
  SerialMon.println(F("Server disconnected"));
  modem.gprsDisconnect();
  SerialMon.println(F("GPRS disconnected"));
}
// End of Arduino file
NEED TO DO TWO CHANGES TO ABOVE ARDUINO CODE
1. Find out your SIM card providers APN. You can google search or use https://wiki.apnchanger.org/ Replace LINE No:9
const char apn[] = "telstra.internet";
In the place of "telstra.internet", put your providers APN
2. In LINE No:12
const char server[] = "nizarmohideen.atwebpages.com";
In the place of nizarmohideen, put your domain address you created.
Select your board “UNO” or whatever board you are using and correct port
Upload
In your web browser type ******.atwebpages.com
Here remember to use your domain address instead of ******
Click the Download button. It will save Excel file Readings.xls into your download folder. When you open the file, you may get a warning message that file format does not match. It is because I have kept the web server code to minimal for simplicity. So you can ignore the warning.